Category

Adhesive Tips

wood-filling-and-finishing

How to Give Woodwork a Professional Restoration That Won’t Crack

By Adhesive Tips No Comments

The common tragedy of home restoration is finishing a project on Sunday only to see a hairline crack appear by Tuesday. You’ve sanded, you’ve stained, and you’ve polished, yet the wood seems to have a mind of its own.

Getting a woodwork restoration to look professional, and stay that way, comes down to one thing most people skip: controlling moisture, movement, and finish compatibility. Cracking usually isn’t bad luck; it’s a process problem. Whether you are using a high-quality wood filler to hide defects or applying a new topcoat, if you want a finish that survives the seasons, you need to understand the science of wood without getting bogged down in technical jargon.

Unsure which product is right for your specific repair? 

GET EXPERT RECOMMENDATION


Here’s how to do it properly so the result lasts.

1. Start With the Right Diagnosis

Before touching a piece of sandpaper, you must figure out why the wood cracked or degraded in the first place. Wood is a “living” material; it breathes and reacts to its environment.

Identifying the Damage

  • Surface cracks: These are usually “checks” caused by the wood drying out or an old finish becoming too brittle to move with the fibers.
  • Deep splits: Often a sign of structural stress or extreme humidity swings. If you just fill these without addressing the “why,” they will reopen.
  • Peeling or flaking finish: This is usually a chemical rejection. Either the previous person used incompatible layers (like oil over wax), or the surface wasn’t prepped.

If you skip this step, you’re just putting a bandage on a broken bone. You’ll restore the look, but not the durability.

2. Stabilize the Wood First

Wood expands and contracts with humidity. If you refinish a piece that has just come out of a damp garage and move it into a dry, heated living room, it will crack.

Environmental Control

  • Acclimatize: Let the piece sit in the room where it will eventually live for at least 3 to 5 days.
  • Ideal Humidity: Keep your workspace between 40% and 60% humidity.
  • Rehydrate: For antique or bone-dry wood, apply a light coat of wood conditioner or a “lean” oil. This reintroduces flexibility into the fibers, making them less likely to snap when the wood moves.

3. Remove the Old Finish Properly

Never layer a new finish over a failing old coating. It’s tempting to just sand the rough spots, but old finishes act as a “bond-breaker” for new ones.

The Prep Process

  • Chemical vs. Mechanical: Use a high-quality stripper for intricate carvings to avoid “rounding off” the sharp details with sandpaper.
  • The Sanding Ladder: Don’t jump straight to fine grit. Start with 120 grit to remove the old gunk, move to 180 to smooth the scratches, and finish with 220.
  • Go With the Grain: Always sand in the direction of the wood fibers. Cross-grain scratches are invisible until you apply stain, then they show up like neon signs.

4. Repair Cracks the Right Way

This is the stage where most professional-looking projects fail. Many people grab the cheapest tub of filler at the hardware store, only to find that it shrinks, crumbles, or doesn’t take stain.

When you want a restoration that won’t crack, you need a product that behaves like the wood itself. This is where a high-performance Wood Filler makes the difference.

Why the Choice of Filler Matters

A professional-grade option is often a resin-based formula. These were developed for industries that require high-strength, uniform results. This is crucial because:

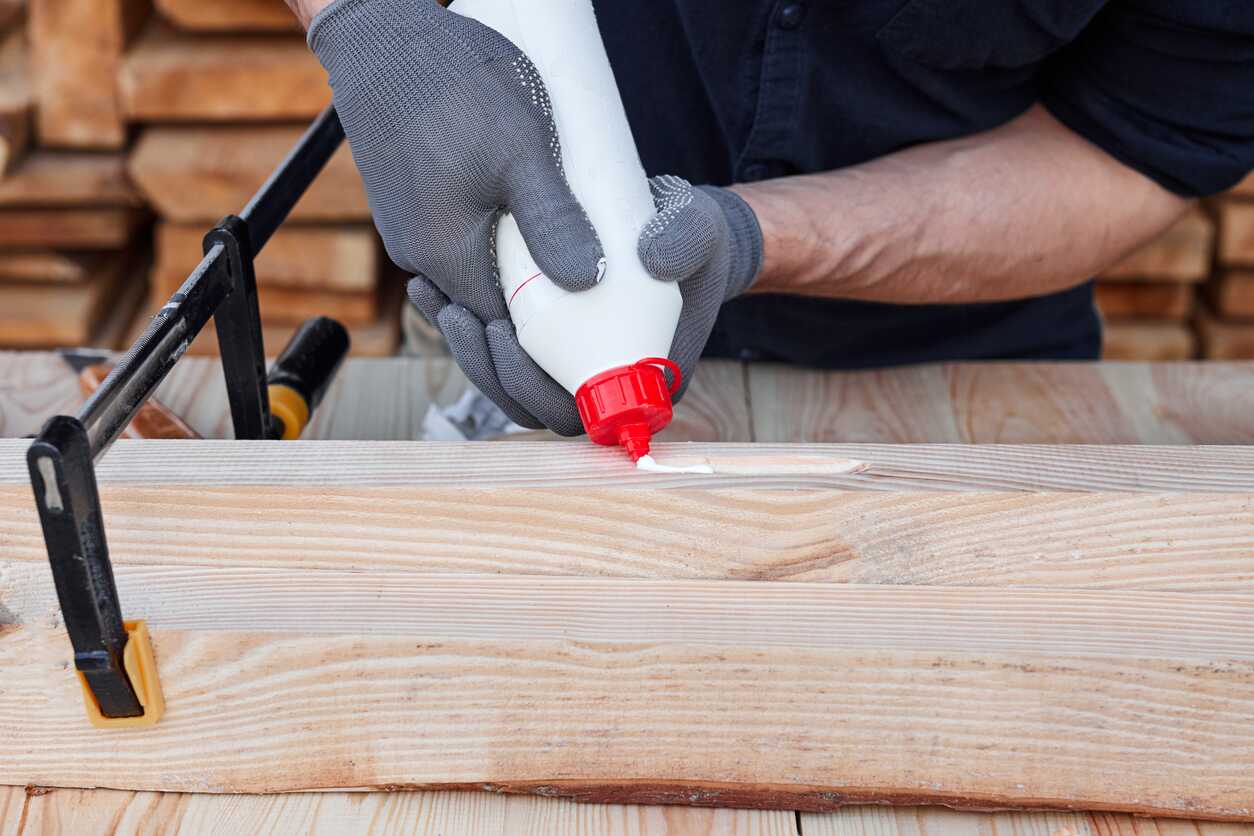
  • Genuine Wood Flour: Look for fillers made with real wood flour. This allows the filler to be sanded, stained, sawed, planed, or even drilled just like ordinary wood once it has set.
  • Minimal Shrinkage: Cheap fillers are mostly water or solvents that evaporate, leaving a “sinkhole.” A high-quality wood filler is fast-setting with a hard finish and little to no shrinkage.
  • Waterproof Durability: A resin-based, waterproof filler won’t crumble or crack even when exposed to varying temperatures or exterior conditions.

Professional Filling Technique

  1. Prep for Adhesion: Ensure the crack is clean and dry. For the most professional look, you can often add a bit of your chosen stain directly to the raw filler before applying it to ensure the color is consistent throughout.
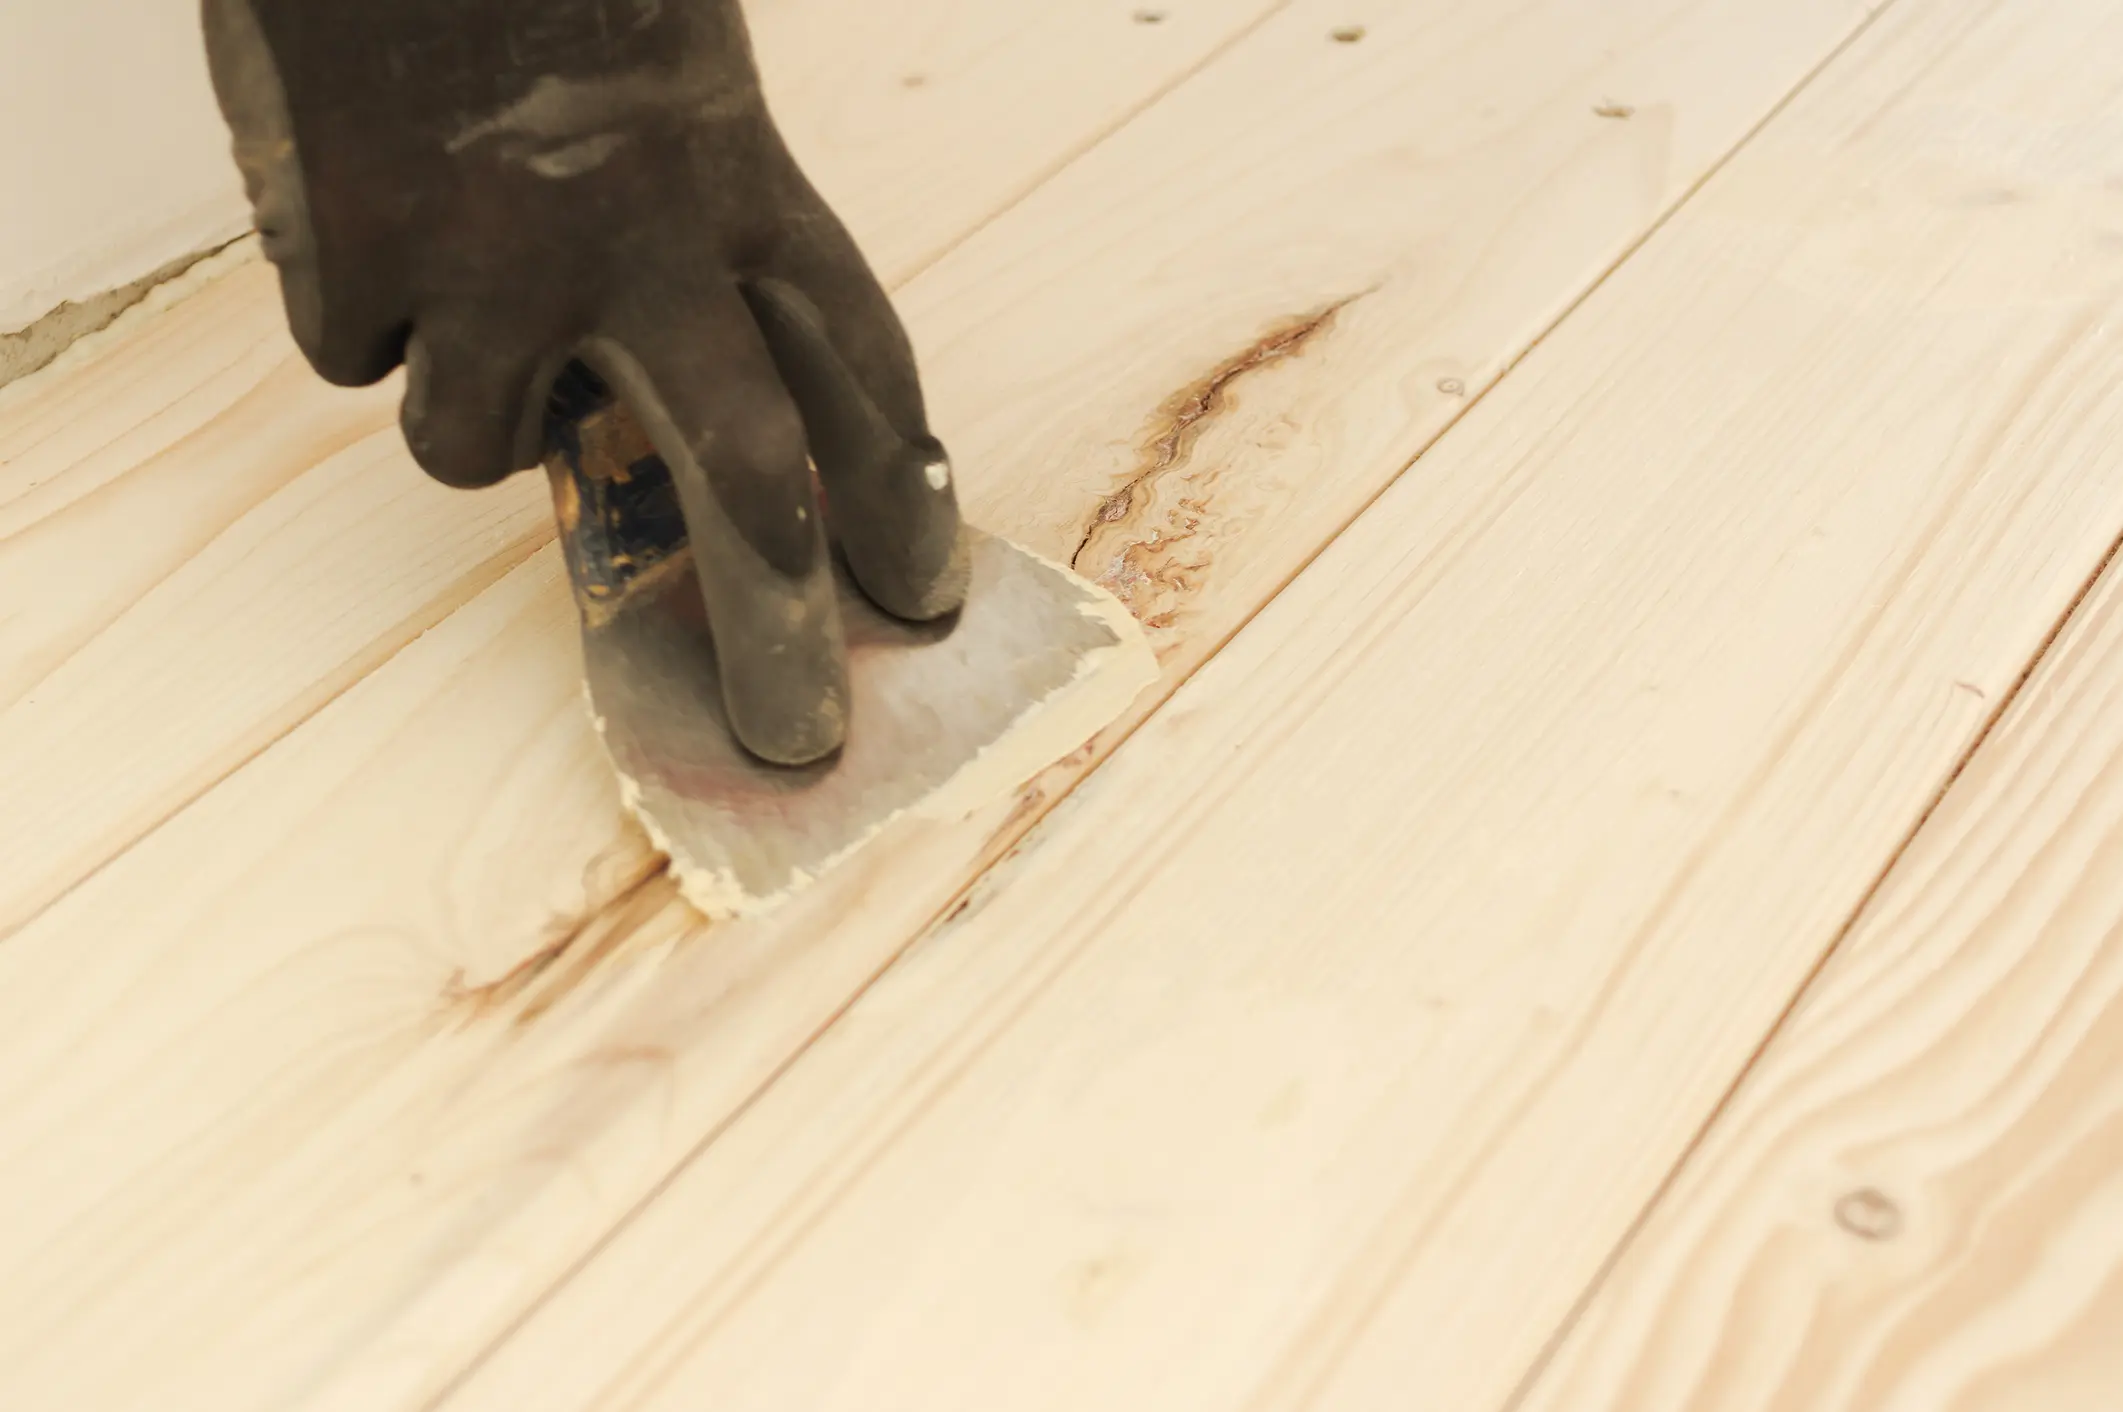
  2. Press Firmly: Use a putty knife to press the filler firmly into the defect. This ensures there are no air pockets that could cause structural failure later.
  3. Sand Flush: Once dry, sand it smooth to the surface. Because a quality filler is uniform and consistent, it will take the final stain or paint evenly with minimal effort.

LEARN MORE ABOUT WOOD FILLERS

When the Problem is Structural

Sometimes a “crack” is actually a joint that has pulled apart. If the wood is physically separated, like a loose stair tread, a gap in a subfloor, or a threshold, a surface filler isn’t enough. In these cases, you need a high-strength bonding agent.

LEARN MORE ABOUT CONSTRUCTION ADHESIVE

Unlike rigid glues that can snap under pressure, an industrial-strength solvent-based adhesive stays flexible over time. This is the “secret weapon” for eliminating squeaks and bridging gaps in heavier woodworking and construction projects. If the wood is moving because the bond has failed, fix the bond first with a waterproof adhesive before you worry about the cosmetic filler.

5. Seal Before You Finish

Think of sealer as the “primer” for your wood. It prevents the wood from drinking up your expensive topcoat unevenly.

Creating a Base

  • Sanding Sealer: Apply a thin coat and let it dry. It will “lock” the wood fibers in place.
  • The “Knock-Back”: Lightly sand the sealer with 220 or 320 grit. You’ll notice the wood feels like glass. This creates a stable base, so your final finish doesn’t “check” (develop tiny spider-web cracks) later.

6. Choose a Flexible, Durable Finish

A “hard” finish isn’t always a “good” finish. If you put a rock-hard, brittle lacquer on a dining table that sits in the sun, the finish will crack as the wood expands.

The Best Modern Options

  • Oil-based Polyurethane: The gold standard for durability. It has a slight amber tint and remains flexible enough to move with the seasons.
  • Hardwax Oils: These are becoming the favorite of professional restorers. They soak into the wood rather than sitting on top, meaning there is no “film” to crack or peel.
  • Water-based Topcoats: Great for keeping the “natural” light color of the wood, but ensure you buy a “high-build” version for better protection.

7. Let It Cure Fully

There is a massive difference between “dry to the touch” and “cured.”

The Waiting Game

  • Dry: The solvents have evaporated. You can touch it, but it’s still soft.
  • Cured: The chemical molecules have linked together to form a hard, protective shield.

Most finishes are dry in 4 hours but take 7 to 30 days to cure. If you put a heavy lamp or a damp coaster on a “dry” but “uncured” table, you will permanently mark the finish or cause micro-cracks.

8. Maintain the Environment

Even a museum-quality restoration will fail if you treat the wood poorly.

Long-term Care

  • Humidity Control: Use a humidifier in the winter. Wood cracks when the air gets too dry and sucks the moisture out of the grain.
  • Sunlight: UV rays break down the chemical bonds in both the wood and the finish. Use curtains or UV-protective window films.
  • Cleaning: Avoid “lemon oil” or silicone-based sprays. They leave a residue that makes future repairs impossible. Just use a damp microfiber cloth.


Achieve a Lifetime Finish with Leech Adhesives

Restoration isn’t about working harder; it’s about working with the wood’s natural tendencies. By using the right materials and respecting the drying times, you ensure that your hard work looks just as good ten years from now as it does the day you finish.

The foundation of any great repair is the bond. Leech Adhesives provides the professional-grade Wood Filler and adhesives needed to bridge the gap between a temporary fix and a permanent restoration. When you use products designed to move, breathe, and age with your woodwork, you eliminate the cycle of cracking and peeling for good.

Ready to start your next project?  Browse the full range of Leech Adhesives products here and give your woodwork the professional-grade repair it deserves.


Frequently Asked Questions

Can I Use Wood Filler on Outdoor Furniture That Stays in the Rain?

Yes, but only if the product is explicitly rated as waterproof and resin-based. Standard water-based “putties” will soften and wash away over time. A resin-based filler acts as a permanent seal that won’t degrade when exposed to the elements.

How Do I Prevent “Shadowing” Where the Filler Meets the Wood?

Shadowing happens when the filler has a different porosity than the wood, causing it to absorb stain differently. To prevent this, sand the filled area thoroughly with fine-grit sandpaper (220+) and use a wood conditioner or sanding sealer before applying your final stain.

Is It Possible to Fill a Crack That Is Still Moving?

If a crack is caused by structural shifting, a filler will eventually pop out. You must first secure the wood using a high-strength construction adhesive like F-26® or mechanical fasteners. Once the movement is stopped, the filler can be used to create a seamless cosmetic finish.

foundation-cracks

Must-Do Spring Home Projects: How to Fix Foundation Cracks Before They Turn Into a Basement Flood

By Adhesive Tips No Comments

As the snow melts and the ground begins to soften, your home faces its most significant seasonal challenge. Spring is prime time for foundation issues because of the “freeze-thaw cycle” that occurred all winter. When water in the soil freezes, it expands; when it thaws, it leaves gaps or puts immense pressure on your concrete walls.

This shifting soil, combined with heavy spring rains, increases hydrostatic pressure. This pressure forces water through any available opening, turning small, overlooked crevices into active leaks. Utilizing high-quality concrete products early in the season can be the difference between a dry home and a disaster.

Early detection during your spring cleaning routine saves thousands of dollars in emergency repairs. By identifying and fixing cracks now, you ensure that showers stay in the garden rather than your basement.

CONNECT WITH A SEALING ADDITIVE SPECIALIST


How Foundation Cracks Start in the First Place

Foundation cracks are rarely the result of a single event; they are usually the culmination of environmental stressors. Understanding why concrete fails is the first step in preventing a catastrophe.

  • Soil Movement: As soil cycles through wet and dry periods, it expands and contracts, causing the heavy foundation to settle unevenly.
  • Hydrostatic Pressure: Saturated soil weighs significantly more than dry soil, pushing inward against basement walls.
  • Poor Drainage: If your gutters are clogged or downspouts terminate too close to the house, water pools at the base of the foundation.
  • Shrinkage: In newer homes, concrete naturally shrinks as it cures, which can create “hairline” cracks that are initially non-structural but still leak-prone.

It is vital to distinguish between a “settlement” crack and a “structural” crack. While some minor cracking is expected in any home, any opening that allows moisture to seep through requires immediate attention to protect your home’s integrity.

Types of Foundation Cracks You Should Never Ignore

Not all cracks are created equal. Identifying the geometry of the crack can tell you exactly what is happening to your home’s “skeleton.”

Vertical Cracks

These are the most common and are often caused by the natural settling of the home. While they are usually not a sign of structural failure, they are the primary highway for water entry during heavy rain.

Horizontal Cracks

Warning: These are serious. Horizontal cracks usually indicate that the pressure from the outside soil is too great, causing the wall to bow inward. This is a structural red flag that often requires professional reinforcement.

Diagonal and Stair-Step Cracks

Diagonal cracks often indicate “differential settlement,” where one corner of the house is sinking faster than the rest. In cinder block foundations, these often manifest as stair-step patterns following the mortar lines.

Widening Cracks

A crack that is wider at the top than the bottom (or vice versa) suggests the foundation is tilting or heaving. If you can fit a dime into the crack, it is time to stop monitoring and start repairing.

Is your foundation showing signs of stress?

LEARN MORE ABOUT CONCRETE REINFORCER


Early Warning Signs of Basement Water Intrusion

You don’t always need to see a puddle to know you have a problem. Often, the signs of a foundation leak are subtle and sensory.

  • Efflorescence: Look for a white, powdery residue on your concrete walls. This is crystallized salt left behind when water evaporates.
  • Musty Odors: That “basement smell” is actually the scent of mold and mildew thriving on damp concrete or behind drywall.
  • Peeling Paint: If you have finished basement walls, bubbling paint, or “crunchy” drywall near the floor, it indicates moisture trapped behind the surface.
  • Increased Humidity: If your basement feels “heavy” or damp compared to the rest of the house, your foundation is likely “breathing” moisture through micro-cracks.

Spring Inspection Checklist for Homeowners

Don’t wait for a flood to grab your flashlight. Follow this step-by-step walkthrough to audit your foundation health this season.

Area to Inspect What to Look For Action Item
Interior Perimeter Damp spots, floor-wall joint leaks Clear storage bins away from walls
Corners Diagonal or stair-step cracks Check for daylight or drafts
Exterior Grading Soil sloping toward the house Add fill dirt to create a downward slope
Gutters Clogs or leaks at the seams Ensure water exits 5+ feet from walls
Visible Foundation Spalling (flaking) concrete Document crack length with photos

Make it a habit to check the basement immediately after the first heavy rain of the spring. This is when “ghost leaks”, cracks that only leak under high pressure, become visible.

DIY Methods for Sealing Small Foundation Cracks

For minor, non-structural cracks (less than 1/8 inch), a DIY approach can be highly effective. The goal is to create a water-tight seal that can handle minor movement.

  1. Preparation: Clean the crack thoroughly using a wire brush to remove loose concrete and dust. A vacuum can help pull debris out of the deep crevices.
  2. Selection: Use a Polyurethane foam injection for active leaks, as it expands to fill the entire void. For structural bonding of thin cracks, an epoxy kit is preferred.
  3. Application: For surface-level fixes, F-26 Construction Glue or specialized masonry sealants can provide a quick barrier, though injection is always superior for deep cracks.
  4. Curing: Allow the material to cure fully according to the manufacturer’s instructions before painting or finishing over the area.

Note: DIY seals are often topical. If the soil pressure remains high, the crack may eventually reopen, or a new one may form nearby.

When a Crack Requires Professional Repair

Some jobs are too big for a hardware store kit. If you encounter any of the following “Red Flags,” call a structural engineer or a basement waterproofing specialist immediately:

  • Width: Any crack wider than 1/4 inch.
  • Active Flow: If water is visibly trickling or spraying through the wall.
  • Bowing: If a level held against the wall shows a curve or tilt.
  • Recurrence: If a previously sealed crack reopens within one season.

Professionals have access to heavy-duty solutions like carbon fiber reinforcement straps, which are stronger than steel and prevent walls from bowing further. They may also install internal drain tile systems or French drains to manage water before it ever touches your foundation.

What Happens If You Ignore Foundation Cracks?

Ignoring a small crack is a gamble with high stakes. Water is persistent; it will eventually find its way in, leading to:

  1. Structural Weakening: Over time, water rusts the rebar inside your concrete, causing the foundation to crumble from the inside out.
  2. Mold Growth: Damp basements are breeding grounds for toxic black mold, which can affect the air quality of your entire home.
  3. Property Value Loss: A wet basement or visible foundation cracks are leading reasons why home sales fall through during the inspection phase.
  4. Total Loss: In extreme cases, a sudden foundation collapse or massive flood can destroy HVAC systems, water heaters, and cherished personal belongings.

Preventing Future Foundation Cracks

Prevention is the most cost-effective “repair” available. Most foundation issues are actually drainage issues in disguise.

  • Manage Your Gutters: Clean them twice a year and ensure downspouts carry water far away from the foundation.
  • Seal Existing Surfaces: To prevent future cracks and water penetration on existing surfaces, use a roller or spray gun to apply a polymer-modified additive. This improves surface bonding and water resistance for steps, walkways, and patios.

LEARN MORE ABOUT CONCRETE REINFORCER


  • Maintain Grading: The ground should slope away from your house at a rate of 6 inches for every 10 feet.
  • Soil Moisture: In extreme heat, concrete can crack if the soil pulls away. Some experts recommend “watering” your foundation during droughts to keep soil volume consistent.
  • Landscaping: Keep large trees at least 10–15 feet away. Roots can exert massive pressure and suck all the moisture out of the soil, causing localized settling.


Spring Maintenance That Protects Your Entire Home

Your foundation is the most important part of your home, yet it is often the most neglected. This spring, don’t just focus on the lawn and the windows; get down into the basement and look at the bones of your house. Small cracks are early warning systems; they are your home’s way of telling you that the environment is winning.

By being proactive and using trusted solutions from Leech Adhesives, you protect your family’s health, your property value, and your peace of mind. Remember the golden rule of homeownership: Fix it now, or flood it later.

Protect Your Home Today

Don’t wait for the next storm to test your foundation. Whether you need heavy-duty structural reinforcement or high-performance sealants, choosing the right materials is crucial.

CONNECT WITH A SEALING ADDITIVE SPECIALIST


FAQ

Can I Use Regular Caulk To Fix A Foundation Crack?

No. Regular caulk is not designed to handle the pressure or the alkaline nature of concrete. Use specialized epoxy or polyurethane injections.

Are Vertical Cracks Always Safe?

While usually less structural than horizontal ones, they are the primary cause of basement leaks. They should still be sealed to prevent water damage.

How Do I Know If My Crack Is Active?

Mark the ends of the crack with a pencil and check back in a month. If the crack has grown past the marks, it is active and needs professional evaluation.


drywall-adhesive

Drywall Adhesives 101: Top Products for Drywall Construction

By Adhesive Tips No Comments

If you’ve ever stared at a sagging ceiling or noticed those annoying “nail pops” bubbling out of your perfectly painted living room wall, you know that gravity is the mortal enemy of a smooth finish. For decades, the standard way to hang drywall was simple: grab a box of nails or screws and start cranking.

But times have changed. Pro contractors and DIY enthusiasts alike have realized that relying solely on mechanical fasteners is a recipe for callbacks and cracks. Enter the world of high-performance bonding agents. By using the right tube of “goop” alongside your screws, you create a continuous bond that makes walls stronger, quieter, and significantly prettier.

Browse Our Professional Grade Bonding Solutions


Why Bonding Beats Bolting Alone

When you use a high-strength wall glue, you aren’t just sticking paper to wood. You are creating a structural “bridge.”

Real-Life Example: Imagine you’re building a modern home with a massive, two-story great room. Because the wall spans are so large, the wood studs will naturally bow and shrink as they season. If you only use screws, the drywall stays rigid while the wood moves, leading to “pops.” By applying a bead of heavy-duty drywall glue, the board stays fused to the stud even as the house settles.

Find the Perfect Match for Your Project


Top Product Categories for Drywall Success

When navigating the aisles (or the website), you’ll see a lot of options. Here is how to categorize them so you pick the right tool for the job.

1. Solvent-Based Heavy Hitters

These are the old-school favorites for a reason. Solvent-based formulas provide an incredibly aggressive “grab.” If you are working in cold weather or with damp lumber—common on many job sites—these formulas are your best friend. They bite through moisture and cold surfaces where water-based options might slide.

  • Best for: New builds, unheated garages, and exterior-facing walls.
  • Pros: Fast set time, works in extreme temperatures.

2. Low-VOC Water-Based Formulas

If you are doing a renovation while living in the house, you don’t want the smell of a chemical plant wafting into the kitchen. Water-based drywall bonding agents have come a long way. They offer high strength with almost no odor and easy cleanup.

  • Best for: Basements, bedroom remodels, and occupied spaces.
  • Pros: Environmentally friendly, easy to wipe off tools.

3. Foam-to-Drywall Specialists

In modern energy-efficient builds, we often see drywall being applied directly over rigid foam insulation. Regular glues can sometimes “melt” the foam or fail to bond to the slick surface. You need a specialized polyurethane or foam-compatible formula here.

Find the Perfect Match for Your Project


Real-Life Scenario: The “Wavy Wall” Fix

We’ve all seen it: an old farmhouse where the studs are anything but straight. If you screw drywall directly to crooked studs, your wall will look like a topographical map.

Professional installers use a “bridge-bonding” technique. By applying a thicker bead of a high-solids gap-filling compound, you can compensate for minor irregularities in the framing. The adhesive fills the voids where the stud curves away, ensuring the drywall stays flat and true. This prevents the “oil-canning” effect and gives you that high-end, gallery-flat finish.

Find the Perfect Match for Your Project


Tools of the Trade: What You’ll Need

To get the best results, you need more than just a tube of glue. Here’s a quick checklist of the gear every pro keeps in their kit for a seamless drywall build-out:

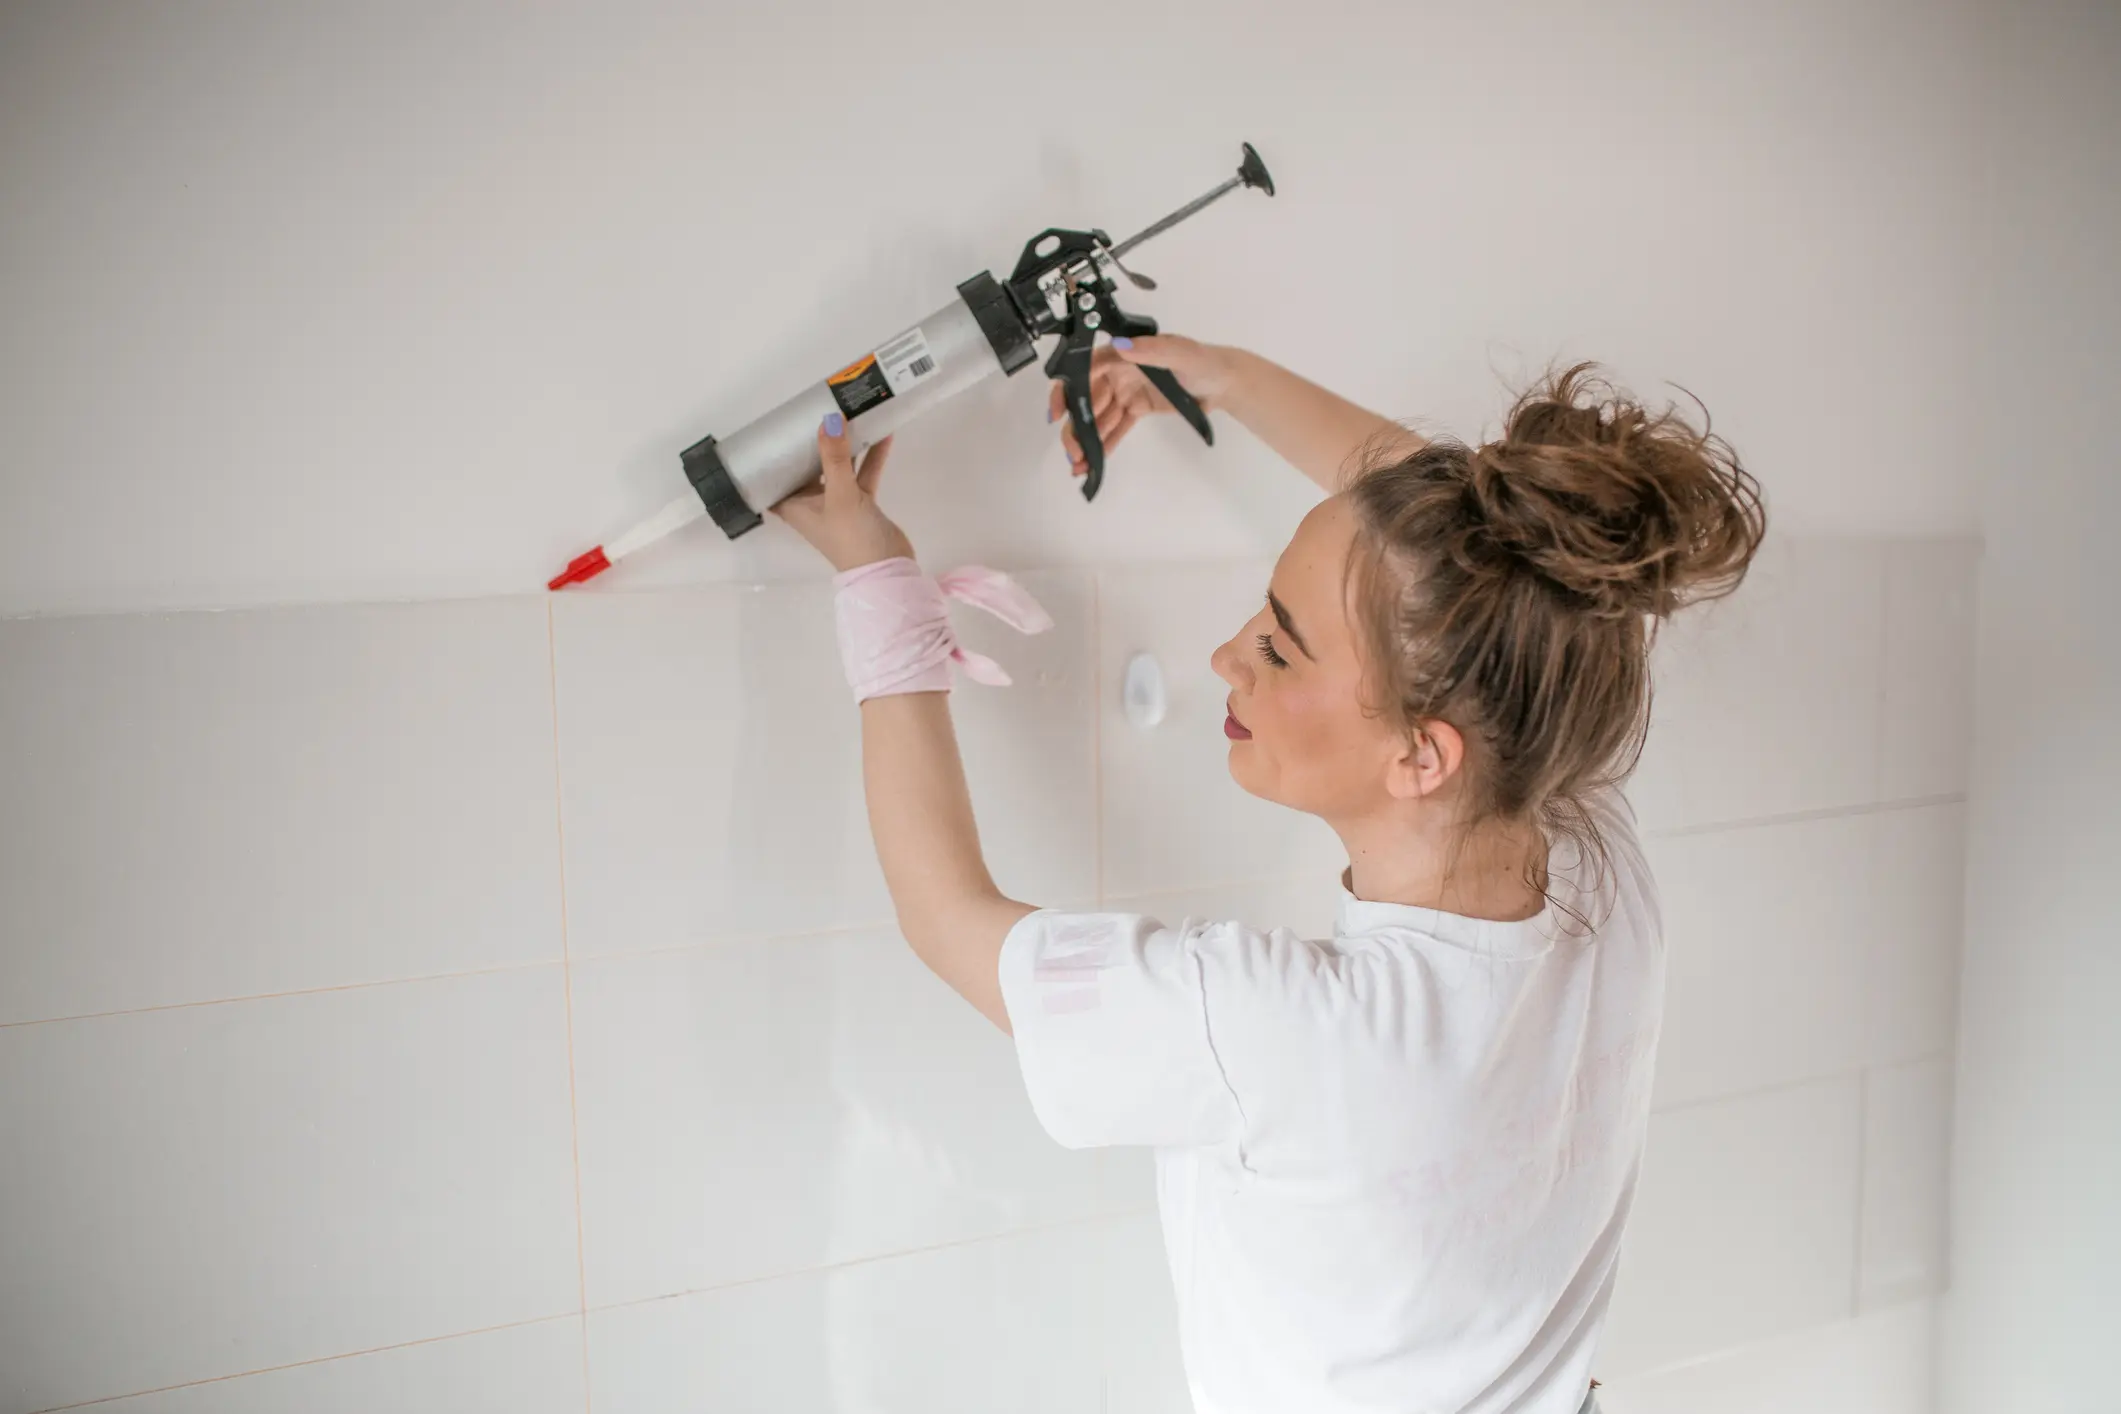
  • High-Ratio Caulking Gun: When you’re squeezing thick, high-viscosity bonding agents all day, a cheap $5 gun will kill your forearms. Invest in a 12:1 or 18:1 thrust ratio gun. It makes the flow smoother and more consistent.
  • Utility Knife: Essential for cutting the nozzle at a 45-degree angle to get that perfect 1/4-inch bead.
  • T-Square and Chalk Line: Accurate layout means you know exactly where the studs are, ensuring your adhesive hits the center every time.

Personal Protective Equipment (PPE): Safety glasses and gloves are a must. Some heavy-duty formulas can be tough to get off your skin, and you definitely don’t want a stray glob in your eye.

Find the Perfect Match for Your Project


The Secret to a Quiet Home: Sound Damping

One often-overlooked benefit of using specialized wall bonding products is acoustics. In a “screw-only” installation, the drywall can vibrate against the studs like a drum skin. This transmits sound from the hallway right into the bedroom.

When you apply a continuous bead of a flexible bonding agent, it acts as a gasket. It breaks the vibration path and helps dampen the transfer of noise. If you’re building a home office or a nursery, skipping the adhesive is a mistake you’ll hear for years to come.

Proper Application Techniques

It isn’t just about where you put the product, but how you apply it. For vertical studs, start at the top and work your way down in a smooth, continuous motion. Avoid the temptation to “zigzag”—a straight vertical bead allows the board to compress evenly.

If you’re applying drywall to a ceiling, it’s often helpful to have a “T-brace” or a drywall lift. This holds the sheet firmly against the joists for those critical first few minutes while you drive your perimeter screws. This ensures the adhesive spreads thin and makes full contact across the entire surface area of the joist.

Common Mistakes to Avoid

  1. The “Frozen Stud” Error: Never apply water-based products to frosted or ice-covered lumber. The bond will fail as soon as the ice melts. Use a solvent-based formula for winter builds.
  2. Over-Gluing: You don’t need to paint the whole stud. A single, consistent bead down the center is more effective than a messy glob that squishes out the sides.
  3. Dusty Surfaces: If your drywall has been sitting in a dusty garage, wipe the back of the board. Glue doesn’t like sticking to dust; it likes sticking to the paper.

Why Leech Adhesives is Your Best Partner for Drywall Projects

At Leech Adhesives, we understand that a project is only as good as the bond that holds it together. Whether you are a professional contractor looking for pallet pricing or a homeowner tackling a weekend basement finish, we provide the industrial-strength products you need to get the job done right the first time.

Our formulas are engineered for maximum durability, ensuring that once that wall goes up, it stays up. No pops, no cracks, and no sagging.

Connect With an Adhesive Specialist

Final Thoughts: Invest in the Bond

Drywall is often the most visible part of your home, yet it’s the part people try to finish the fastest. By taking the extra ten seconds to run a bead of high-quality wall bonding agent down your studs, you are ensuring your work. You are protecting against the natural movements of the earth and the wood, and you’re ensuring a professional finish that lasts a lifetime.

Ready to start your next build? Contact one of our adhesive specialists to determine the right Leech Adhesive for your next drywall project!


Frequently Asked Questions (FAQs)

  1. Can I use “All-Purpose” glue for hanging drywall on the ceiling?

While some general-purpose bonding agents work, it is highly recommended to use a formula specifically rated for “Subfloor and Drywall” or “Heavy Duty Wall Application.” Ceilings deal with constant gravitational shear. You need a product with high “wet grab” so the board doesn’t sag before you can get your screws in.

  1. How many tubes do I need for a standard room?

A good rule of thumb is one 28 oz cartridge for every 4 to 5 sheets of 4×8 drywall. This allows for a consistent 1/4-inch bead on every intermediate stud. Remember, you don’t usually glue the perimeter—just the center studs!

  1. Do I still need to use screws if I use a high-strength wall glue?

Yes. Think of the glue as the permanent strength and the screws as the “clamps” that hold it in place while the bond cures. However, using a high-quality bonding agent allows you to use up to 50% fewer screws, which means 50% less mudding and sanding for you later!

bonding-agents-glue-and-wood-filler

The Difference Between Bonding Agents, Glue, and Wood Filler: Selecting the Right Home Improvement Products for You

By Adhesive Tips No Comments

Whether you are a seasoned DIY veteran or someone who just bought their first toolbox to fix a leaky faucet, walking down the hardware aisle of a home improvement store can be an overwhelming experience. You are met with a wall of tubes, bottles, and canisters, all claiming to “fix anything to everything.”

While they all serve the general purpose of sticking things together, filling gaps, or repairing surfaces, using the wrong product can lead to messy failures, wasted money, and—in the worst-case scenario—structural damage. Understanding the chemistry and the mechanical intent behind these items is the first step toward a successful renovation.

The team at Leach Adhesives wants to break down the differences between heavy-duty bonding agents, standard glue, and wood filler for you. We’ll take a look at real-world examples of when to use each, weigh their pros and cons, and help you make the right choice for your next project.

DISCOVER OUR PRODUCTS FOR YOUR NEW HOME IMPROVEMENT PROJECT


1. Glue: The Precise Bonder

When we think of “glue,” most of us picture the white liquid we used in elementary school. In the world of home improvement, glue is generally defined as a bonding agent used for smaller, more precise applications. Glues usually work by evaporating a carrier liquid or reacting with moisture in the air to create a firm connection.

Real-World Example: Furniture Repair

Imagine you have a wooden dining chair where the rung has started to wobble. You don’t need a thick, heavy-duty paste for this; you need a dedicated wood-bonding liquid. This type of glue is designed to penetrate the fibers of the timber, creating a link that is often stronger than the material itself once it dries. Because it is thin, it flows into the grain, ensuring that every millimeter of the joint is connected.

Other common uses: Repairing a ceramic vase (using Cyanoacrylate or “Instant Bond” liquids).

  • Crafting projects involving paper, cardboard, or light fabric.
  • Binding small plastic components in household electronics or toys.
  • Decorative veneering where a thin, invisible layer is required.

Pros and Cons of Glue

Pros Cons
Precision: Easy to apply in small amounts to tight, narrow spaces. Low Gap-Filling: If surfaces don’t touch perfectly, it won’t bridge the void.
Clarity: Many glues dry clear, making them ideal for visible repairs. Brittleness: Can crack under heavy vibration or shifting over time.
Ease of Use: User-friendly bottles with no special application tools required. Surface Specific: Often only works on porous materials like wood or paper.

LEARN MORE ABOUT OUR BONDING GLUES


2. Heavy-Duty Bonding Agents: The Structural Lifters

While “glue” and other bonding terms are often used interchangeably, in the professional building world, we differentiate between light liquids and heavy-duty pastes. These high-performance compounds are designed to hold substantial weight and withstand harsh environments, such as fluctuating temperatures or high humidity.

These products are often thicker than glue—having a paste-like consistency—and are designed to link disparate materials like timber to masonry or aluminum to drywall. Unlike thin liquids, these pastes stay where you put them, providing “green strength” (immediate hold) even before they are fully cured.

Real-World Example: Installing Wall Panels or Subflooring

If you are finishing a basement and need to attach wood furring strips to a masonry wall, a standard liquid glue won’t cut it. You need a high-viscosity bonding paste. These products are formulated to “grab” the surface immediately and hold heavy loads while the curing process takes place. They are also designed to be flexible enough to handle the natural expansion and contraction of building materials as the weather changes.

Other common uses:

  • Installing decorative stone veneers or brick slips.
  • Securing subflooring to floor joists to prevent annoying squeaks.
  • Mirror installations where a specialized non-corrosive mastic is required.
  • Attaching heavy trim or baseboards to uneven walls.

Pros and Cons of Heavy-Duty Bonding Agents

Pros Cons
High Load Capacity: Designed for significant weight-bearing tasks. Messy: Can be very difficult to clean up once it starts to set.
Gap-Filling: Thick enough to bridge gaps between uneven or warped surfaces. Required Tools: Usually requires a manual or battery-powered dispensing gun.
Versatility: Can link non-porous materials like metal, glass, and heavy stone. Longer Cure Times: Achieving full structural strength can take 24–48 hours.

LEARN MORE ABOUT OUR HEAVY DUTY ADHESIVES


3. Wood Filler: The Restorer and Finisher

Wood filler is the outlier in this group. While it is applied like a paste, its primary job isn’t to hold two separate pieces of material together—it’s to bridge gaps, hide imperfections, and restore the surface of the wood itself. Unlike glue, which creates a bond between two surfaces, wood filler is a “body” material designed to occupy space and then harden to mimic the texture of timber.

Real-World Example: Restoring an Old Door Frame

Imagine you’ve removed old hardware from a door, leaving behind deep screw holes and jagged gouges. You aren’t trying to “stick” anything here; you are trying to make the surface flush again. You apply wood filler into the holes, overfilling slightly. Once it dries, it becomes hard enough to be sanded down until it is perfectly level with the rest of the wood, creating a seamless surface ready for paint or stain.

Other common uses:

  • Filling “checks” or small cracks in wooden furniture.
  • Hiding nail holes in baseboards and trim after installation.
  • Smoothing out grain in open-pored woods for a high-gloss finish.
  • Repairing chipped corners on wooden desks or tables.

Pros and Cons of Wood Filler

Pros Cons
Sandability: Can be sanded to a perfectly smooth, flush finish. Zero Structural Strength: Should never be used to hold weight or join two pieces.
Aesthetics: Available in different wood tones or “stainable” formulas. Inflexibility: Unlike caulk, most fillers will crack if the wood moves or shifts.
Rapid Drying: Many solvent-based fillers dry quickly for fast repairs. Shrinkage: Deep holes may require multiple “layers” as the filler shrinks during drying.

LEARN MORE ABOUT OUR WOOD FILLER


How to Choose: A Quick Reference

If you are standing in the store and still aren’t sure which one to grab, ask yourself these three simple questions:

  1. Is there a hole or gouge to hide? If you are trying to make a surface look smooth and seamless again, use wood filler.
  2. Is it heavy or meant to be permanent? If you are sticking a heavy board or stone to a wall, use a heavy-duty bonding agent.
  3. Is it a small, delicate repair? If you are fixing a broken handle on a coffee mug or a loose piece of furniture trim, use glue.


Why Quality Matters: The Leach Difference

When you’re putting your time and effort into a home improvement project, the last thing you want is for the bond—or the repair—to fail six months down the line. Using professional-grade products makes the difference between a “quick fix” and a “permanent solution.” At Leach, we have spent decades perfecting the science of sticking things together and perfecting surfaces. Whether you are looking for high-performance structural pastes or specialized fillers for a pristine finish, our products are engineered for durability and professional results.

CONTACT AN ADHESIVE SPECIALIST


Frequently Asked Questions (FAQ)

Q1: Can I use wood filler to stick a joint together if I’m in a hurry?

No. Wood filler has very little adhesive strength. It is designed to sit inside a gap, not to act as a bridge between two moving parts. If you use it to “glue” a chair leg back on, it will crumble the moment someone sits down. Use a dedicated wood glue for the bond and filler only for the cosmetic gaps.

Q2: Why did my glue fail to stick to my plastic project?

Plastics are notoriously difficult to bond because many have “low surface energy” (they are naturally oily or slippery). Most standard wood or school glues won’t work. For plastic, you specifically need a bonding agent labeled as a “Polymer Bonder” or a resin designed for non-porous surfaces.

Q3: Can I stain wood filler to match my floor?

It depends on the type. Some fillers are “stainable,” meaning they contain wood fibers that absorb pigment. However, they often absorb stain differently than real wood. For the best match, we recommend testing a small amount of filler and stain on a scrap piece of wood before applying it to your main project.

wood-filler

Wood Filler vs. Heavy-Duty Bonding Agents: Which is Right for Your Project?

By Adhesive Tips No Comments

When you step into a hardware store or browse an industrial supply catalog, the variety of repair and sticking agents can be overwhelming. For builders, DIY enthusiasts, and professional contractors alike, the choice often boils down to two different types of solutions: wood filler and structural adhesives.

While both are essential in a workshop or on a job site, they serve entirely different purposes and are engineered with vastly different chemistries. Using a filler when you need a structural bond—or using a thick, permanent adhesive when you need a smooth, sandable finish—can lead to project failure, messy results, or expensive structural damage down the line. In this comprehensive guide, we’ll break down the chemical differences, strength profiles, and ideal applications for each to ensure your next build stands the test of time.

SELECT YOUR PERFECT SEALANT


Understanding the Basics

What is Wood Filler? 

Wood filler is a specialized repair medium used primarily to bridge small gaps, cracks, or holes in timber. Unlike bonding agents, which are meant to hold two separate pieces together under tension, filler is a “void-filler.”

It is usually composed of wood by-products, such as fine sawdust or wood flour, mixed with a binder. Depending on the specific product, that binder might be water-based, solvent-based, or a two-part epoxy system. Its primary job is aesthetic. It is designed to be worked after it dries—meaning you can sand it flush, stain it to match the surrounding grain, or paint it. It is the go-to choice for making a damaged or fastened surface look whole and flawless again.

LEARN MORE ABOUT WOOD FILLER


What is a Structural Bonding Agent? 

Often packaged in heavy-duty caulking tubes, these industrial-strength bonding agents are formulated to provide high-strength, permanent connections between irregular or large surfaces. They are designed for load-bearing tasks and “rough” construction where structural integrity is the priority.

These agents are engineered to bond a wide variety of dissimilar materials, including timber, masonry, metal, plastic, and even concrete. Unlike fillers, which become rigid and brittle, these formulas stay slightly flexible after they have fully cured. This “permanent elasticity” is vital in building, as it allows the bond to absorb the natural expansion, contraction, and vibration of building materials without cracking or losing its grip.

LEARN MORE ABOUT HEAVY-DUTY BONDING PRODUCTS


The Key Differences at a Glance

Feature Wood Filler Structural Bonding Agents
Primary Use Patching holes, cracks, and grain Framing, subfloors, and heavy mounting
Structural Strength Low (not for load-bearing) High (designed for structural integrity)
Finish Can be sanded, stained, or painted Typically cannot be sanded or stained
Shrinkage High (often requires two coats) Low to none
Flexibility Rigid/Brittle when dry Flexible (absorbs vibration)
Substrates Wood only Multi-surface (Metal, Stone, Concrete)

GET A PROFESSIONAL RECOMMENDATION


When to Reach for Wood Filler

Wood filler is the “cosmetic surgeon” of the workshop. It isn’t there to hold the house up; it’s there to make the house look perfect.

Best Applications:

  • Filling Nail Holes: After finishing a trim, baseboard, or crown molding installation, you are left with dozens of small “shiner” holes from the nail gun. Filler hides these fasteners completely once painted.
  • Repairing Gouges and Dents: If a piece of furniture has been chipped during a move or a floorboard has a deep scratch, a high-quality filler restores the flat surface.
  • Covering Grain: For high-end cabinetry, fine-finishers often use thinned filler to level out porous wood grains (like oak or walnut) to create a glass-smooth surface before applying a lacquer or paint.
  • Correction of Miter Gaps: Even the best carpenters occasionally have a miter joint that doesn’t close perfectly. A dab of stainable filler can make that gap vanish.

The Pro-Tip: Wood filler does not have structural “grip.” If you try to screw into a hole filled only with standard wood filler, the screw will likely pull out, as the material is too brittle to hold a thread under tension.

When to Reach for Structural Adhesives

If filler is the makeup, a heavy-duty mounting adhesive is the skeleton. It is designed for “rough” builds where strength is the only priority.

Best Applications:

  • Subflooring: This is perhaps the most common use. To prevent annoying floor squeaks caused by wood-on-wood friction, contractors apply thick beads of structural sealant to the top of floor joists before securing the plywood.
  • Mounting Heavy Items to Walls: If you are sticking wood paneling to a masonry wall or mounting decorative beams to a ceiling, you need a high “green grab” agent that can support weight while it cures.
  • Outdoor Landscaping: Many of these industrial formulas are completely waterproof. They are used to bond stone caps to retaining walls, bricks to concrete steps, or timber sleepers in garden beds.
  • Dissimilar Materials: This is where these agents truly shine. If your project requires you to bridge the gap between wood and non-porous surfaces like galvanized steel, PVC, or stone, a filler will fail, but a structural bonder will thrive.

GET A PROFESSIONAL RECOMMENDATION


Strength and Durability Factors

One of the most common mistakes in the field is assuming that “hard” means “strong.”

Wood filler dries very hard, but it is also very brittle. It is designed to stay put inside a confined space (like a hole). However, it has almost no tensile or shear strength. If the wood moves due to humidity—which it always does—the filler cannot move with it. This is why you often see filler “popping” out of exterior cracks after a single season.

Structural bonding agents excel in dynamic environments. Because they remain slightly flexible, they act as a shock absorber. When people walk on a floor or a house shifts slightly during a storm or high winds, these bonds can stretch and compress. This prevents the bond from “snapping” under the pressure of movement. For any application where safety or structural integrity is involved, flexibility is actually a sign of superior strength.

Cleanup and Safety

Most modern fillers are water-based and easy to clean with a damp cloth while wet. Once dry, they are removed by sanding. While, heavy-duty adhesives often contain stronger solvents. They usually require mineral spirits for cleanup and can have a strong odor. Always ensure proper ventilation when using industrial-strength products in enclosed spaces.

Finding the Right Professional Grade Products

Whether you are a professional contractor finishing a massive job site or a weekend warrior fixing a family heirloom, the quality of your bond determines the longevity of your work.

At Leech Adhesives, we provide the industrial-strength solutions you need for every stage of the build—from high-performance fillers that disappear under a coat of stain to rugged structural bonding agents that withstand the harshest elements.

GET A PROFESSIONAL RECOMMENDATION


Frequently Asked Questions (FAQ)

  1. Can I use wood glue for outdoor projects?

Only if the glue is specifically rated for exterior use (look for ANSI/HPVA Type I or Type II water-resistance ratings). Standard PVA wood glue will dissolve or soften when exposed to high humidity. For heavy-duty outdoor structural work, a waterproof structural sealant is usually the safer bet.

  1. Why do I need to clamp wood glue but not heavy-duty bonding agents?

Wood glue is thin and needs to be forced into the wood pores; clamping also ensures the glue layer is as thin as possible, which is where it is strongest. Gap-filling adhesives are thick and designed to bridge voids, so while you need to “seat” the materials together (often with a few nails or screws), heavy clamping is usually unnecessary.

  1. How long does a structural adhesive take to dry?

Most have a “skin time” of 15–30 minutes, meaning you must join the materials quickly. While it may feel tacky or “set” within an hour, it typically takes a full 24 to 48 hours to reach maximum structural strength, depending on the temperature and humidity.

popular-construction-adhesives

5 Most Popular Construction Adhesives and How to Use Them

By Adhesive Tips No Comments

When it comes to the integrity of a building project—whether you are a professional contractor framing a luxury home or a DIYer installing a kitchen backsplash—the “glue” holding it all together is often just as important as the nails and screws. In fact, since 1930, Leech Adhesives has been a staple on American jobsites for one simple reason: they provide bonds that last a lifetime.

Choosing the right construction adhesive isn’t just about grabbing the first tube you see. Different formulations are designed for specific materials, temperatures, and environmental stresses. To help you build with confidence, we’ve broken down the 5 most popular construction adhesives from the Leech Adhesives lineup and how to master their application.


1. Leech F-26®: The Premier Heavy-Duty Workhorse

If there is a “gold standard” in the world of construction glue, it is the F-26 Adhesive. Known as the “Workhorse,” this solvent-based mastic is engineered for high-stress, permanent installations.

How to Use It:

This adhesive is designed for heavy lifting. Apply a continuous bead to one surface (usually the sturdier substrate). For subfloors or treated lumber, a 1/4″ bead is standard. Press the surfaces together and apply momentary pressure. Because of its gap-filling properties, it’s excellent for irregular surfaces like brick or masonry.

  • Pros: Incredible structural strength; works on wet, frozen, or pressure-treated lumber; waterproof and weatherproof.
  • Cons: Not safe for polystyrene foam (the solvents will melt it); requires proper ventilation during application.

2. Leech F-13®: The Versatile Finish Specialist

While the former adhesive handles the heavy lifting, F-13® High Quality Construction Adhesive is the specialist for interior finishes and delicate materials. It is most famous for its “Fast-Grab” technology, which keeps materials from sliding while the bond sets.

How to Use It:

This adhesive is the go-to for crown molding and paneling. Apply small beads to the back of your trim. The high initial tack allows you to position the piece and have it stay put immediately, requiring 70% fewer nails for temporary bracing.

  • Pros: Safe for polystyrene foam and plastic panels; works in temperatures as low as 0°F; reduces the need for mechanical fasteners.
  • Cons: Lower ultimate structural strength compared to other adhesives; designed more for finish work than heavy framing.

3. X-30® Contact Cement: The Laminate King

For bonding non-porous materials like high-pressure laminates to wood bases, X-30® Contact Cement is the industry favorite. Unlike traditional construction glues that stay wet for a while, contact cement works through “fusing” two dried films together.

How to Use It:

Apply a thin, even coat to both surfaces. Wait 15–20 minutes until the adhesive is tacky but doesn’t transfer to your finger. Carefully align the pieces—once they touch, they bond instantly and cannot be repositioned. Use a J-roller to ensure maximum contact.

  • Pros: Immediate bond with no clamping required; resistant to household chemicals and extreme heat.
  • Cons: No room for error during alignment; high VOCs require excellent ventilation.

4. Leech Silicone Rubber Sealant: The Moisture Barrier

In “wet zones” like kitchens and bathrooms, you need more than just a bond—you need a seal. Leech Silicone Rubber Sealant is a high-performance adhesive and sealant in one, specifically designed for areas exposed to water.

How to Use It:

Clean the joint thoroughly to remove oils and old caulk. Apply a steady bead around sinks, tubs, or backsplashes. Use a smoothing tool or a gloved finger dipped in soapy water to “tool” the bead for a professional, watertight finish.

  • Pros: 100% waterproof; remains flexible to accommodate joint movement; prevents mold and mildew.
  • Cons: Cannot be painted; does not bond well to some porous woods.

5. Leech Wood Filler: The Restoration Essential

While technically a repair adhesive, Leech Wood Filler is a favorite among general contractors for permanent repairs on oak flooring and cabinetry. It is often used alongside construction adhesives to finish a project seamlessly.

How to Use It:

Ensure the area is dry and free of debris. Press the filler into the crack or hole using a putty knife, overfilling slightly to account for minor shrinkage. Once dry, sand it flush with the surface.

  • Pros: Sustainable and permanent; will not crack over time; takes stain and paint exceptionally well.
  • Cons: Best suited for static repairs rather than structural bonding.


At-a-Glance Construction Adhesive Comparison Chart

Adhesive Type Best Use Case Temperature Range
F-26® Heavy Framing, Decks, Masonry All Weather
F-13® Trim, Paneling, Foam Insulation Down to 0°F
X-30® Countertops, Laminates, Veneers Room Temp
Silicone Sinks, Tubs, Backsplashes All Weather
Wood Filler Floor & Cabinet Repair Interior/Exterior


Build It Right the First Time with Leech Adhesives

Don’t let your hard work be undone by a failing bond. Whether you are tackling a complex commercial build or a weekend kitchen renovation, using professional-grade adhesive products ensures your project stands the test of time. A failed adhesive doesn’t just mean a squeaky floor—it means costly repairs and safety risks. Ready to elevate your construction game? Shop the full Leech Adhesive here and experience the strength that has defined the industry for nearly a century.


FAQ: What People Are Asking About Construction Adhesives

1. How long does construction adhesive take to dry and fully cure?

While many adhesives offer a “fast grab” within minutes, there is a big difference between drying and curing. Most construction adhesives reach a strong initial set in about 24 hours, but a full structural cure—where the bond reaches maximum strength—can take up to 7 days. Factors like cold temperatures, high humidity, or non-porous surfaces (like metal) can extend this timeline significantly.

2. Why is my construction adhesive not sticking?

The most common reason for adhesive failure is poor surface preparation. Dust, grease, moisture, or old glue residue create a barrier that prevents the new adhesive from “wetting” the surface. Another common culprit is using the wrong adhesive for the material—for example, using a solvent-based glue on polystyrene foam, which can actually dissolve the material instead of bonding it. Always ensure surfaces are clean, dry, and compatible with your chosen product.

3. Can construction adhesive be used in cold or wet weather?

It depends on the formula. Many standard water-based adhesives will freeze or fail to cure in temperatures below 40°F. However, high-performance solvent-based adhesivess are engineered for “all-weather” use. These products can be applied to wet,


weatherproof sealant - Weatherproofing a New Home: Essential Adhesives and Sealants Every Builder Should Be Using - weatherproof sealant

Weatherproofing a New Home: Essential Adhesives and Sealants Every Builder Should Be Using

By Adhesive Tips No Comments

In the world of residential construction, a home is only as strong as its weakest point of entry. While architectural beauty and structural integrity often take center stage, the invisible line of defense, being the sealants and adhesives used throughout the building, determines whether a house becomes a lifelong sanctuary or a maintenance nightmare.

Weatherproofing isn’t just about keeping rain out; it’s about managing air infiltration, preventing vapor transmission, and ensuring that the home remains energy-efficient and mold-free for decades. For modern builders, the stakes are higher than ever with evolving building codes and demanding climate patterns.

To achieve a high-performance “tight” house, professionals are turning to the chemical expertise of industry leaders like Leech Adhesives. With a legacy of bonding power dating back decades, Leech provides the industrial-grade solutions necessary to seal a home from foundation to ridge vent.

In this guide, we will explore the critical areas of weatherproofing and the specific Leech Adhesives products that should be in every builder’s arsenal.


The Building Shell: Why “Close Enough” Isn’t Enough

The building shell, also known as envelope, is the physical separator between the conditioned and unconditioned environment of a building. When this shell is compromised, energy bills skyrocket and structural components begin to rot.

Consider a new build in the Pacific Northwest. Without high-quality flashing sealants around window headers, wind-driven rain can seep behind the siding. Over five years, this “micro-leak” can rot the OSB sheathing and create a breeding ground for black mold, often hidden until the damage costs tens of thousands of dollars to repair.

Using a premium sealant like Leech’s Silicone Sealants ensures that even under extreme thermal expansion and contraction, the bond remains flexible and watertight.

Browse Leech Adhesives Products


Windows and Doors: The Primary Vulnerability

Windows and doors are the most common points for water intrusion. A builder can buy the most expensive triple-pane windows on the market, but if they are installed with cheap, hardware-store-grade caulk, the system will fail.

The Solution: High-Performance Sealants

Look for specialized sealants designed to bond to various substrates including vinyl, wood, aluminum, and masonry.

  • Adhesion: Unlike standard caulks that peel away over time, Leech products are formulated to “bite” into the surface.
  • Flexibility: As a house settles, windows move. Leech sealants offer high movement capability, meaning they stretch rather than snap.

For example, homes in coastal regions are exposed to salt air that can degrade inferior adhesives. Builders using Leech’s Heavy Duty construction adhesives and specialized exterior sealants find that their seals remain intact despite high UV exposure and corrosive environments.

Subfloors and Structural Bonding: Preventing Air Leaks from Below

Weatherproofing isn’t just an exterior job. Air infiltration through subfloors and sill plates can account for up to 30% of a home’s heat loss.

When a builder applies Leech’s F-26 adhesive they aren’t just preventing floor squeaks. They are creating a continuous gasket between the joist and the subfloor. This prevents air from “whistling” through the gaps from a crawlspace or basement into the living quarters.

Get a Quote on Our Adhesive Supplies


Exterior Siding and Trim: The First Line of Defense

The “Rain Screen” principle is a modern construction strategy that assumes no siding is 100% waterproof. Instead of trying to create a single, impenetrable wall, a rain screen relies on a two-layered defense: the exterior cladding (siding) sheds the bulk of the water, while a small air gap behind it allows any moisture that sneaks through to drain away or evaporate.

However, for a rain screen to function, the “holes” in the shell must be perfectly managed. At joints, corners, and penetrations (like hose bibs or electrical outlets), the sealant does the heavy lifting. If these points aren’t sealed with industrial-grade products, water doesn’t just sit on the siding—it gets trapped in the air gap, leading to structural rot.

Many builders make the mistake of using a “one-size-fits-all” caulk. However, different materials expand and contract at different rates, a phenomenon known as differential movement:

  • Brick to Wood: Requires high-modulus elasticity to bridge the gap between heavy masonry and shifting timber.
  • PVC Trim: Requires an adhesive that won’t “melt” or chemically react with the plastic but still provides a permanent, weather-tight bond.

Leech’s Real Wood Filler are staples here. For exterior decorative trim that needs to withstand the elements, their waterproof bonding agents ensure that joints stay tight and seamless, preventing water from ever getting behind the facade.


Roofing and Flashing: Where Gravity Works Against You

A roof is the most punished part of any home. From scorching summer heat to freezing winter ice dams, the adhesives used in flashing and shingle repair must be “indestructible.”

Using Leech Adhesives’ specialized sealants around chimney flashings and skylights provides a secondary barrier that far outlasts traditional roofing cement. In a real-world scenario—such as a sudden Midwestern hail storm—the integrity of these seals determines whether the interior drywall stays dry or becomes a soggy mess.


The Cost of Cutting Corners

In a 2,500-square-foot home, the cost difference between using the cheapest available sealants and using a premium suite of Leech Adhesives products is often less than $500.

Compare that to the cost of a single callback. If a homeowner reports a leak around a window six months after move-in, the builder loses money on labor, materials, and reputation. By “over-speccing” the adhesives and sealants at the start, you are essentially buying an insurance policy for your craftsmanship.


The Leech Standard: Engineering Longevity 

In the world of modern construction, a structure is only as strong as its weakest bond. Leech Adhesives provides the chemical backbone for high-performance building envelopes. By choosing our advanced polymer blends, you aren’t just buying glue; you’re investing in moisture-vapor protection and superior shear strength.

From high-tack subfloor adhesives that eliminate squeaks to UV-resistant roof sealants, Leech ensures your building envelope remains impenetrable. When the margin for error is zero, why risk a $500,000 build on a bargain-bin sealant? Elevate your standard with Leech Adhesives—the professional choice for structural integrity.

 Get a Quote on Our Adhesive Supplies


Adhesives for Weatherproofing a Home FAQs

1. Can I apply Leech sealants to wet surfaces?

While most adhesives and sealants perform best on dry surfaces, several Leech products are formulated to have high moisture tolerance. This is essential for builders working in humid climates or during seasons where wood framing may be damp. Always check the specific product technical data sheet (TDS) for application requirements.

2. How long do Leech adhesives take to cure in cold weather?

Cure times vary based on temperature and humidity. Generally, colder temperatures slow down the chemical reaction. However, Leech Adhesives offers specific formulas designed for “all-weather” application that maintain a faster set-time even when the temperature drops, ensuring your project stays on schedule.

3. Which Leech product is best for sealing windows?

For window installations, we recommend our high-grade silicone sealants. These provide the necessary UV resistance and “elastomeric” properties (the ability to stretch and return to shape) required to handle the movement between the window frame and the home’s siding or masonry.

adhesive_tip_for_cold_weather

Winter-Proof Your Work: Adhesive Tips for Cold Weather Jobs

By Adhesive Tips No Comments

Now that we are in the winter months, we want to make sure that your adhesive products are winter-proofed and ready for any cold-weather construction jobs. The adhesive experts at Leech Adhesives have compiled a list of adhesive tips you can keep as you prepare for upcoming construction projects during these colder months.

The secret to success in cold weather isn’t just about picking the right product; it’s about preparation, application finesse, and understanding the science behind adhesive products.

How Does Winter Impact Adhesive Performance?

Adhesives work through a chemical process called curing. During curing, the adhesive transitions from a liquid or paste to a solid, forming a strong bond with the substrate surfaces. This chemical reaction is highly dependent on temperature.

When temperatures drop, three problems can arise:

1. Increased Thickening

Most solvent-based and water-based adhesives become thicker in the cold. A thick adhesive is difficult to apply, making it hard to spread evenly. Additionally, a highly viscous glue cannot properly “wet out” the substrate, meaning  it can’t spread into the pores and contours of the bonding material. Without proper wet-out, the contact area between the adhesive and the substrate is minimized, leading to a weak, superficial bond.

2. Slowed Curing Time

Slowed curing time is one of the most common issues. The chemical reaction that enables curing slows down dramatically in cold temperatures. What might take 24 hours to cure at 70°F could take several days or even weeks at 30°F. If the bond is loaded or stressed before it reaches its full strength, the application may be weak.

3. Surface Condensation and Frost

When cold materials are brought into a warm environment (or vice versa), moisture can condense on the surface, or frost can form. Adhesives, especially water-based formulas, are often incompatible with surface moisture. A wet or icy substrate acts as a bond inhibitor, preventing the adhesive from making direct contact with the material and resulting in a weakened application.

Key Tips for Cold-Weather Adhesive Applications

Preventing these issues from arising requires a strategic approach to storage, preparation, and application. By following these three strategies, you can ensure your adhesive performs optimally, even when the thermometer dips below freezing.

1. Optimize Storage Temperature 

The single most effective action you can take to ensure a strong bond is to keep the adhesive warm and the substrates frost-free.

  • Warm the Adhesives: Never store adhesive cartridges or cans in a cold truck overnight, instead store them in a climate-controlled area, ideally between. Bring only enough product to the job site for immediate use. A warm cartridge flows easily and has a better chance of starting its chemical reaction efficiently.
  • Condition the Materials: If possible, store bonding materials (lumber, concrete, drywall, etc.) indoors or in a temporary heated enclosure. When cold materials are brought together, they act as a heat sink, drawing energy away from the adhesive and slowing the cure. If indoor storage isn’t feasible, use temporary heat sources like salamander heaters or heat guns (used cautiously) to warm the application surfaces just before applying the glue. The surface must be clean, dry, and free of frost, ice, or snow.

2. Adjust Application and Open Time

Because curing is slow and viscosity is high, you must adapt your application technique.

  • Use the Right Bead Size: Since cold, viscous adhesive doesn’t spread as easily, a slightly larger bead may be necessary to ensure adequate coverage and “wet-out” across the entire bonding area once the substrates are pressed together.
  • Mind the Open Time: Cold temperatures will slightly increase the “open time” (the amount of time the adhesive can be exposed to air before curing starts and a bond must be made). However, be cautious: while the chemical cure is slower, some surface solvents or water can still evaporate, creating a “skin” on the bead. Work efficiently to join the materials as soon as possible after application.
  • Increase Clamping and Fastening: In warm weather, a quality construction adhesive can sometimes eliminate the need for mechanical fasteners. In cold weather, this is risky. Use a greater number of mechanical fasteners (screws, nails, clamps) to hold the materials tightly together. This pressure ensures maximum surface contact (wet-out) while the slow curing process takes place. The fasteners must bear the load until the adhesive reaches its functional strength, which may take significantly longer than standard cure times.

3. Choose a High-Performance, All-Weather Formula

While proper technique is essential, the reality is that some products are simply engineered to perform better in extreme conditions than others. This is where choosing a specialty, heavy-duty construction glue becomes critical. Look for adhesives explicitly labeled as all-weather, waterproof, or heavy-duty construction-grade formulas. These are the types of adhesive that contractors have relied on for decades, all with proven results.

The Leech Adhesives Solution: Bonding in Any Condition

When project timelines are on the line, you need a solution that is built to defy the elements. Leech Adhesives has built its reputation since 1930 by manufacturing premium, USA-made products that don’t just meet industry standards but exceed them, especially in adverse weather.

Our flagship product that stands as the professional’s choice for cold-weather work is our F-26® Premium Quality Waterproof Construction Adhesive.

F-26® is not just a standard construction glue; it is a high-strength, solvent-based formula trusted for durable, long-lasting results in applications from wood and metal to concrete and drywall. Its unique formulation allows it to maintain superior performance and shear strength even when temperatures plunge.

By including F-26® into your winter construction projects you benefit from:

  1. Extreme Climate Capability: The formula is specifically engineered to function effectively in both high heat and bitter cold, providing a more consistent application and reliable cure than general-purpose adhesives.
  2. Superior Durability: It provides a permanent, waterproof bond, making it ideal for exterior applications where joints are continuously exposed to freeze/thaw cycles, moisture, and temperature fluctuations.
  3. Versatility: While F-26® is the cornerstone, at Leech, we also offer specialty adhesives that perform in cold, such as their Silicone Rubber Sealant for weatherproofing gaps and joints, and industrial-strength X-30 Contact Cement for demanding interior work on diverse substrates.

Use Leech Adhesives for Your Cold Weather Construction Projects

Winter weather doesn’t have to put your construction and remodeling projects on ice. By embracing a strategy that focuses on preparation, like warming your materials and adhesives, you can dramatically improve bond strength in low temperatures.

Ultimately, your success hinges on the quality of your materials. Choosing a time-tested, heavy-duty adhesive product, like the ones at Leech Adhesives, is an investment in durability. 

It’s the difference between a temporary fix and a permanent, high-performance solution that can withstand the most challenging conditions winter months can throw at it. Don’t let the cold compromise your craftsmanship, instead winter-proof your work today with Leech Adhesives.

Contact us for more information and to answer any questions you may have. We look forward to working with you!

Frequently Asked Questions (FAQ) About Cold Weather Adhesives

1: What is The Lowest Temperature at Which Most Standard Construction Adhesives Can Be Applied?

While this varies significantly by formula (water-based vs. solvent-based), most standard adhesives specify an application temperature range that should not drop below 40°F (4°C). 

High-performance, all-weather construction glues, such as those made by Leech Adhesives, are often rated for application and performance in much colder temperatures, sometimes as low as 0°F (-18°C), provided the substrate is clean and free of frost. 

Always check the Technical Data Sheet (TDS) for the specific product you are using.

2: Can I Use a Heat Gun To Warm Up The Substrate Before Applying Glue?

You can and should slightly warm the substrates to remove any trace of frost or condensation, which is critical for a strong bond. 

A heat gun is the safest way to do this, used cautiously to warm the surface to a temperature just above ambient air. 

*Remember, the goal is to get the substrate surface just warm enough to ensure the adhesive’s initial chemical reaction can begin effectively.

3: How Much Longer Does It Take For a Construction Adhesive To Fully Cure in Cold Weather Compared to Warm Weather?

The cure time can easily be two to four times longer, and sometimes even more. A standard adhesive that achieves functional cure in 24 hours at 70°F may take 3 to 7 days to reach the same strength at temperatures consistently near 40°F (4°C). 

If temperatures drop below freezing, the curing process can stop, or the adhesive may never reach its maximum specified strength. This extended cure time is why the use of mechanical fasteners (screws, clamps) is important for cold-weather jobs until the adhesive has fully hardened.


tip saving construction tips with the help of adhesives.

Contractor Time-Savers: 7 Tricks to Shave Hours Off Your Next Build

By Adhesive Tips No Comments

On any construction site or project, time is crucial, and knowing some time-saving tricks can help ensure that you and your team stay on track as you approach project deadlines. One key component of saving time on a project is utilizing the right construction materials to help you reach the finish line on time.

The team at Leech Adhesives wants to share with you 7 tips to shave time off your next build, with the help of quality adhesive products. The goal is to cut labor hours on your next build and ensure you are using the right adhesive products to get you there.

The 7 Proven Adhesive Tricks to Finish Faster

1. The Subfloor Squeak Eliminator: F-26® Adhesive

One main reason for warranty callbacks and customer frustration in residential framing is the squeaky subfloor. Traditional nailing relies on friction that can loosen over time. The trick here is to utilize a high-performance adhesive like Leech’s F-26® Premium Construction Adhesive on every joist and every panel tongue-and-groove joint, and follow up with a reduced nailing schedule. F-26® was engineered specifically for this structural task, and is a product that provides a permanent bond that remains flexible, helping prevent those costly squeaky floors. 

2. The Bracing Bypass: F-26® & F-13® Adhesives

Non-productive waiting time is the enemy of a busy schedule. Many vertical installations, such as paneling, foam insulation, or tub surrounds, can require extensive bracing while the adhesive cures. This waiting game can be reduced by using products formulated for high initial grab, which quickly hold materials in place.

Leech F-26® offers this high initial tack, allowing parts to be held with only momentary pressure. The application method is key to maximizing this speed: after applying the product, join the two materials, pull them apart for 15–40 seconds (the prescribed open time), and then immediately re-join them. This application helps the adhesive’s chemistry for an instant, fast hold, allowing the crew to move immediately to the next panel without stopping to set up extended temporary bracing. Similarly, F-13® can provide a strong grip for tub and shower surrounds without requiring any surface damage from traditional fasteners.

3. Cutting Drywall Fastener: F-13® Adhesive

For interior wall installations, combining adhesives with mechanical fasteners can help with the speed of application and overall quality. Standard practice requires screws every few inches across the panel, leading to significant time spent driving fasteners and expensive labor dedicated to mudding and sanding every single fastener head.

By applying construction adhesive, like Leech F-13®, to the studs, contractors can greatly reduce the number of fasteners used in the field area of the panel. This technique not only reduces the labor needed for running screws but can also accelerate the downstream finishing trade. Fewer fasteners mean less mudding and sanding. The adhesive provides structural rigidity, minimizing movement and settling that often cause long-term fastener pops—a major source of costly callbacks and rework.

4. Product Consolidation with Multi-Purpose Adhesives: F-26® & F-13® Adhesives

Time is often lost sorting through material or running to the supply house because the “specific” adhesive needed for a transition, like bonding foam to metal, is missing. Multi-purpose construction adhesives are designed to prevent this by handling a variety of materials under one versatile formula.

Keeping your truck stocked with highly compatible formulas like F-26® and F-13® is a massive logistical time saver. F-13® is exceptionally versatile, bonding wood, paneling, drywall, and ceramic tile, and is specifically effective for installing polystyrene foam insulation. F-26® handles subfloors, treated lumber, stone, and ceramics. By using these broad-spectrum products, you simplify ordering, reduce storage confusion, and, most importantly, eliminate the costly delay associated with using the wrong material that leads to bond failure and inevitable rework.

5. Rapid Bonding for Trim and Laminates: X-30® Adhesive

Finish work requires precision and speed, especially when installing plastic laminates, metal sheets, or decorative trim pieces. These non-porous materials often resist the initial grab of standard construction adhesives and require extensive clamping.

Leech X-30® Contact Cement eliminates clamping time by developing strength almost instantaneously upon surface mating. X-30® is a fast-drying formula that provides rapid strength build-up and high ultimate strength. This rapid cure and high initial strength allow finish crews to maintain a continuous, high-speed workflow across the site, rather than waiting sequentially for each piece of trim to set.

6. Silent Installs: Avoiding Noise Curfews and Headaches

Many construction projects, particularly remodels in occupied residential, office, or institutional buildings (like schools or hospitals), are subject to strict noise ordinances or must operate outside standard working hours to minimize disruption. The drilling and pneumatic nailing required for mechanical fastening can easily violate these rules, forcing expensive overtime or work stoppages.

Adhesive bonding can provide a nearly silent installation method for tasks such as paneling, subflooring, or roof membrane application. Strategically using adhesives can help to reduce the overall noise at a construction site. This allows crews to work efficiently during standard daylight hours, helping to keep the project on both schedule and budget. F-13®, which works well even in cooler temperatures, further ensures that project momentum is maintained regardless of marginal weather delays that might affect standard job site schedules.

7. High-Volume Application: Maximize Yield, Minimize Loading

The single largest labor saving when using modern adhesive systems comes from the reduction in handling, refilling, and applying the product. High-yield canisters can cover significantly more areas, sometimes up to eight times the yield of a traditional cartridge adhesive. By utilizing high-volume dispensing systems adapted for products like F-26®, the crew minimizes time spent reloading and maximizes the coverage rate per hour. This maximized yield means less labor per square foot, providing the clearest operational measure of chemical technology, translating directly into labor efficiency.

Build Smart, Not Harder With Leech Adhesives

Construction adhesives are essential products for efficient contracting. The transition from purely mechanical fastening to sophisticated adhesive bonding not only reduces installation time but also enhances the long-term structural integrity of the project. When you integrate Leech Adhesive products into your standard construction procedures, you move beyond replacing a nail with a tube. Instead, you are working to streamline construction logistics, reduce callback frequency, and maximize productive labor hours. Contact Leech Adhesive today to learn how our products can better serve you and your team. We are here to answer any questions you have and get you started on the right foot for your next construction project.

We look forward to working with you!

woman using adhesive for interior construction project

Start Indoors, Stay Profitable: Interior Remodeling Projects That Stick (and Sell)

By Adhesive Tips No Comments

Start Indoors, Stay Profitable: Interior Remodeling Projects That Stick (and Sell)

Interior remodeling is not just about keeping your crew busy year-round; it’s about maximizing your resources and delivering projects that truly impress potential buyers.

In the competitive world of real estate and remodeling, the products you use can determine not just the project outcome, but overall profitability. Choosing adhesives that fail can mean more money and time spent in the long run, which no construction owner or team member wants!

That’s why the adhesive experts at Leech Adhesives have compiled some of the top 5 interior remodeling projects to consider this winter season to help with longevity and overall profit.

1. Remodeling Project 1: Kitchen Cabinet & Counter Refacing

The kitchen is the heart of the home and the number one ROI driver. Projects focusing on cabinetry and countertops offer maximum visual impact for minimal structural work. Whether you are installing a new heavy-duty pantry or refacing existing cabinet doors, the adhesive must be uncompromisingly strong.

The Leech Solution: F-26® Construction Glue & X-30® Contact Cement

For securing the main cabinetry frames and mounting blocks to the wall studs, there is no substitute for the strength of F-26® Premium Quality Waterproof Construction Adhesive. F-26 delivers a powerful, long-lasting bond that prevents cabinet sag and movement. For laminate or veneer countertop applications, which require a fast, permanent bond across a wide surface area, the X-30® Contact Cement provides a heat-resistant, reliable solution that ensures the finish won’t peel or bubble over time. Efficiency equals profitability, and Leech products reduce the risk of costly post-sale failures.

2. Remodeling Project 2: Bathroom Tub Surround and Vanity Upgrades

Bathrooms are second only to kitchens in driving property value. A quick, cost-effective bathroom refresh often involves replacing the vanity, upgrading wall paneling, or installing new tub surrounds. These are high-humidity, high-risk areas where water resistance is paramount for a profitable job.

The Leech Solution: F-13® Construction Adhesive & Silicone Rubber Sealant

When installing plastic or fiberglass tub enclosures and surrounds, you need an adhesive that is durable yet versatile. The F-13® High Quality Construction Adhesive is specifically formulated for these materials. It offers excellent water resistance and maintains a ductile, flexible bond that can absorb the slight movement of plastic panels without cracking. For sealing the perimeter of the tub, shower pan, and vanity backsplash, this type of product is the best choice. This sealant provides a long-term, water-tight barrier against leaks and mold, protecting your profit margin from expensive water damage call-backs down the line.

3. Remodeling Project 3: Interior Trim & Molding Installation

The small details often carry the most weight in a sale. Flawlessly installed crown molding, baseboards, and window casings add perceived value and give a polished, high-end look that justifies a premium price. The goal is a seamless finish that hides all imperfections.

The Leech Solution: Real Wood Filler & F-13® Construction Adhesive

For securing long lengths of molding and trim, the F-13® Construction Adhesive provides a strong hold and enough working time (10–20 minutes) to perfectly align joints and copes before it cures. This prevents gaps from appearing when the wood contracts during the winter heating season.

The secret to a profitable trim job is the finish. Whether it’s filling nail holes or small defects, Real Wood Filler is a top-tier choice. It is both sustainable and permanent, meaning a repair with Real Wood Filler won’t crack over time. A flawless finish can drastically enhance the look and quality of the entire remodel.

4. Remodeling Project 4: Subfloor Stabilization and Flooring Prep

One major complaint, and reason for home remodels, is due to noise issues. The fall and winter months are the ideal time to examine subfloor issues prior to any new applications being laid. The prep work is key to delivering a high-quality finished project in any remodel. 

The Leech Solution: F-26® Premium Quality Construction Adhesive

Use the F-26® Construction Glue to permanently adhere loose subflooring sheets to the joists. F-26 provides a structural bond and can help to eliminate squeaks in the home coming from the floor. This adhesive is known for being heavy-duty and fills minor gaps, creating a rigid, clean surface. By using F-26, you solve a major homeowner complaint proactively, boosting client satisfaction and reducing the chance of retention or repair requests. 

5. Remodeling Project 5: Accent Walls and Interior Paneling

Accent walls, like shiplap, wainscoting, or custom paneling, are highly trending design features that offer excellent visual ROI without the high cost of full wall replacement. These projects are fast, profitable, and require an adhesive that maintains flexibility over drywall or plaster.

The Leech Solution: F-13® Construction Adhesive & Tap-N-Glue

F-13® is the ideal choice for paneling. Its consistent quality and superior application make it easy to work with on vertical surfaces. It keeps its flexibility and ductility as it ages, which is key for paneling, which may move slightly with temperature and humidity changes.

When it comes to more complex panel repairs, like built-in shelving, our Tap-N-Glue product can offer a precision solution. Tap-N-Glue is known for its attention to detail that allows for quick, targeted fixes that maintain the high quality of the finish work, keeping your project timeline tight and your profits secure.

Stick to Quality with Leech Adhesives 

The common thread running through all profitable interior remodels is the adherence to quality products. Contractors and construction professionals who use Leech Adhesives products are the ones whose projects stick, and find themselves securing long-term customer satisfaction and profitability.

Don’t risk your reputation on second-rate glues. Ensure your interior remodel is built to last with the quality adhesives trusted by professionals since 1930. Contact us at Leech Adhesives today, and get ready for your next interior remodeling project.